AWS User Provision with Infisign
Step 1:
- Sign in to the AWS Management Console: AWS Management Console.
- Navigate to the IAM (Identity and Access Management ).
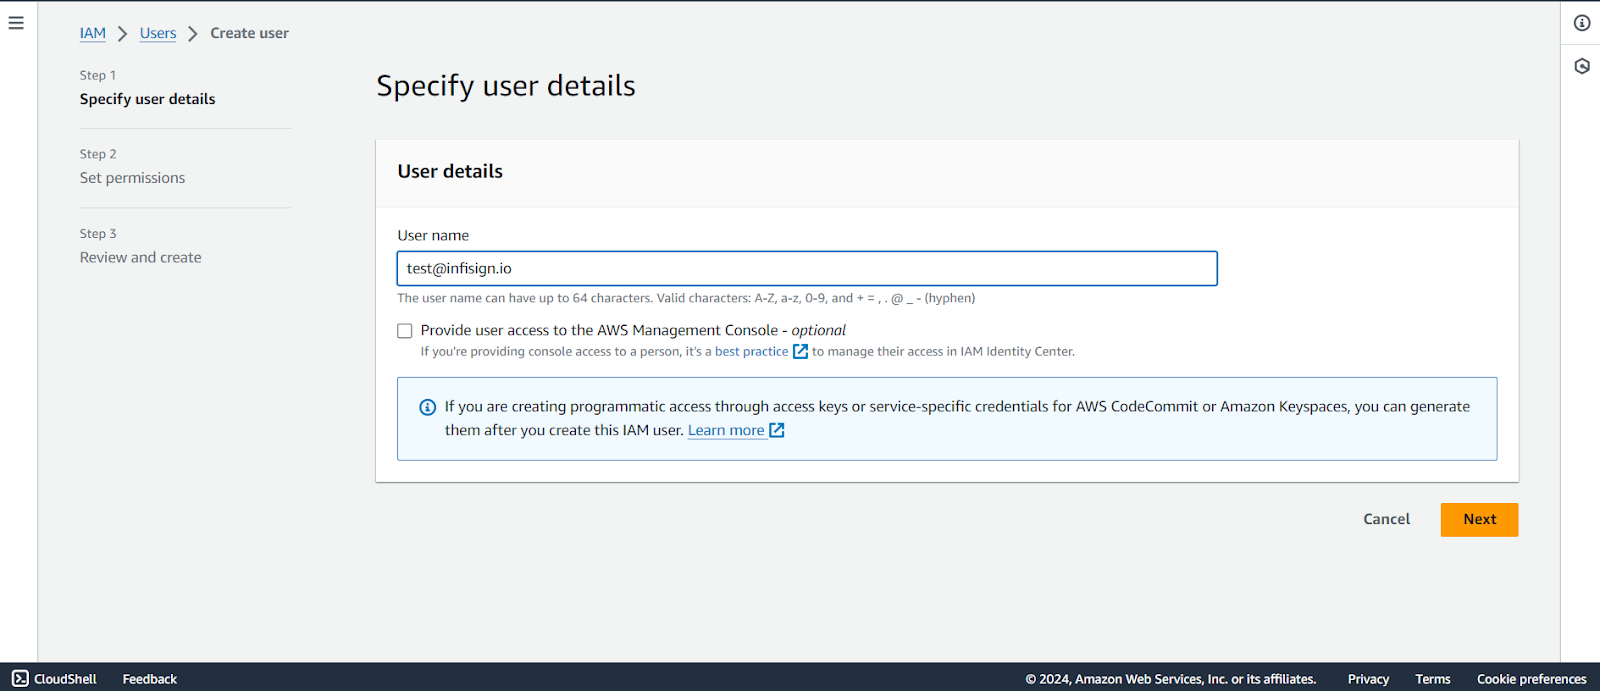
- Select the Users and Click Create User.
- Enter userName and click Next,
Step 2:
- Select the option “Attach policies directly.”
- Add the following policy in JSON format:
{
    "Version": "2012-10-17",
    "Statement": [
        {
            "Sid": "AllowListSSOInstances",
            "Effect": "Allow",
            "Action": [
                "sso:ListInstances"
            ],
            "Resource": "*"
        },
        {
            "Sid": "AllowListPermissionSets",
            "Effect": "Allow",
            "Action": [
                "sso:ListPermissionSets",
                "sso:ListPermissionSetsProvisionedToAccount",
                "sso:ListAccountsForProvisionedPermissionSet",
                "sso:DescribePermissionSet",
                "sso:ListAccountAssignments"
            ],
            "Resource": "*"
        },
        {
            "Sid": "AllowIdentityStoreRead",
            "Effect": "Allow",
            "Action": [
                "identitystore:ListUsers",
                "identitystore:DescribeUser",
                "identitystore:ListGroups",
                "identitystore:DescribeGroup"
            ],
            "Resource": "*"
        },
        {
            "Sid": "AllowListAccountAssignmentsAndRelated",
            "Effect": "Allow",
            "Action": [
                "sso:ListAccountAssignments"
            ],
            "Resource": "*"
        },
        {
            "Sid": "AllowCreateAccountAssignment",
            "Effect": "Allow",
            "Action": [
                "sso:CreateAccountAssignment",
                "sso:DeleteAccountAssignment"
            ],
            "Resource": "*"
        }
    ]
}
Once the policy JSON is added, click “Next” to proceed.
Step 3:
- Review the summary and click create user.

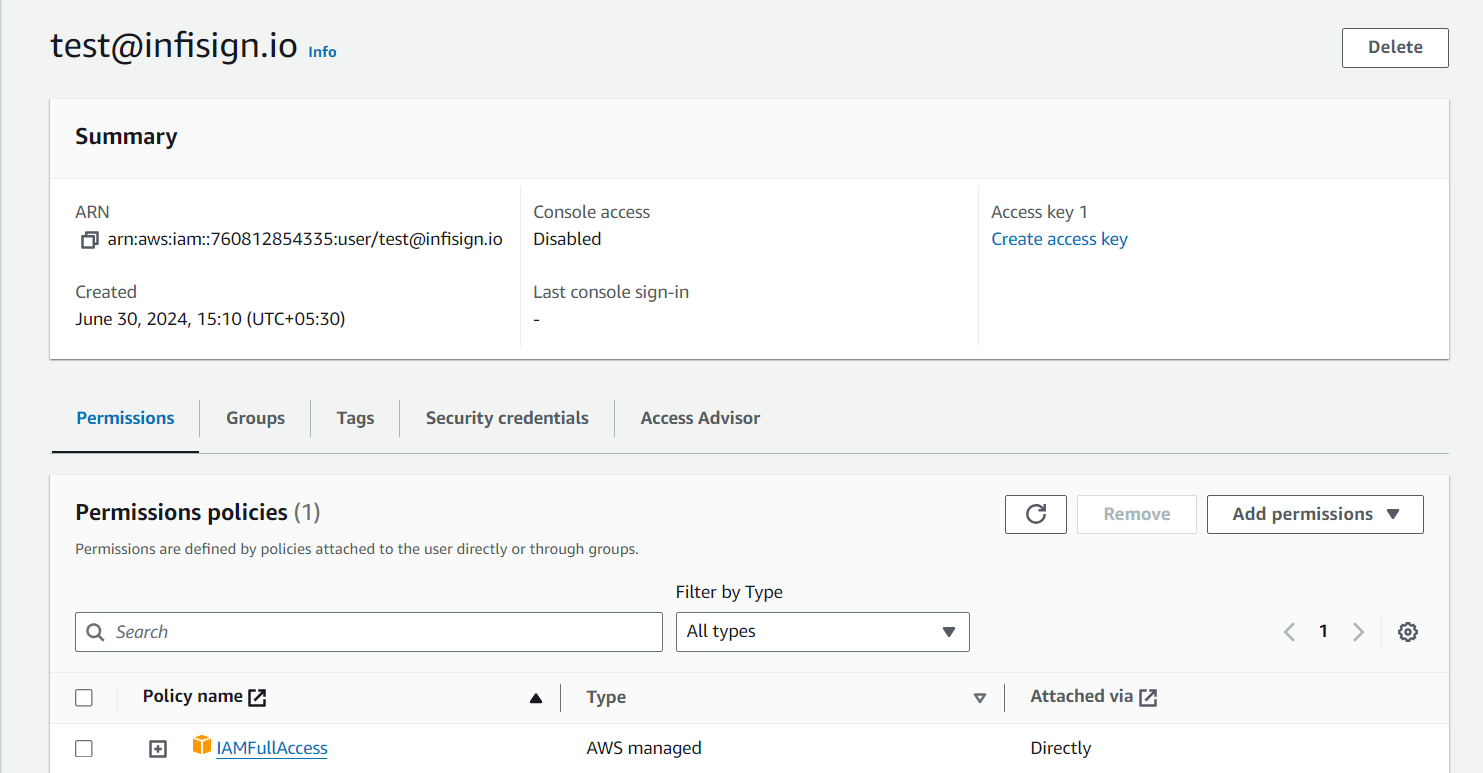
Step 4:
- Once the user creates, click the user to create the access key and secret key.
Step 5:
- Navigate to the security credentials and click create access key

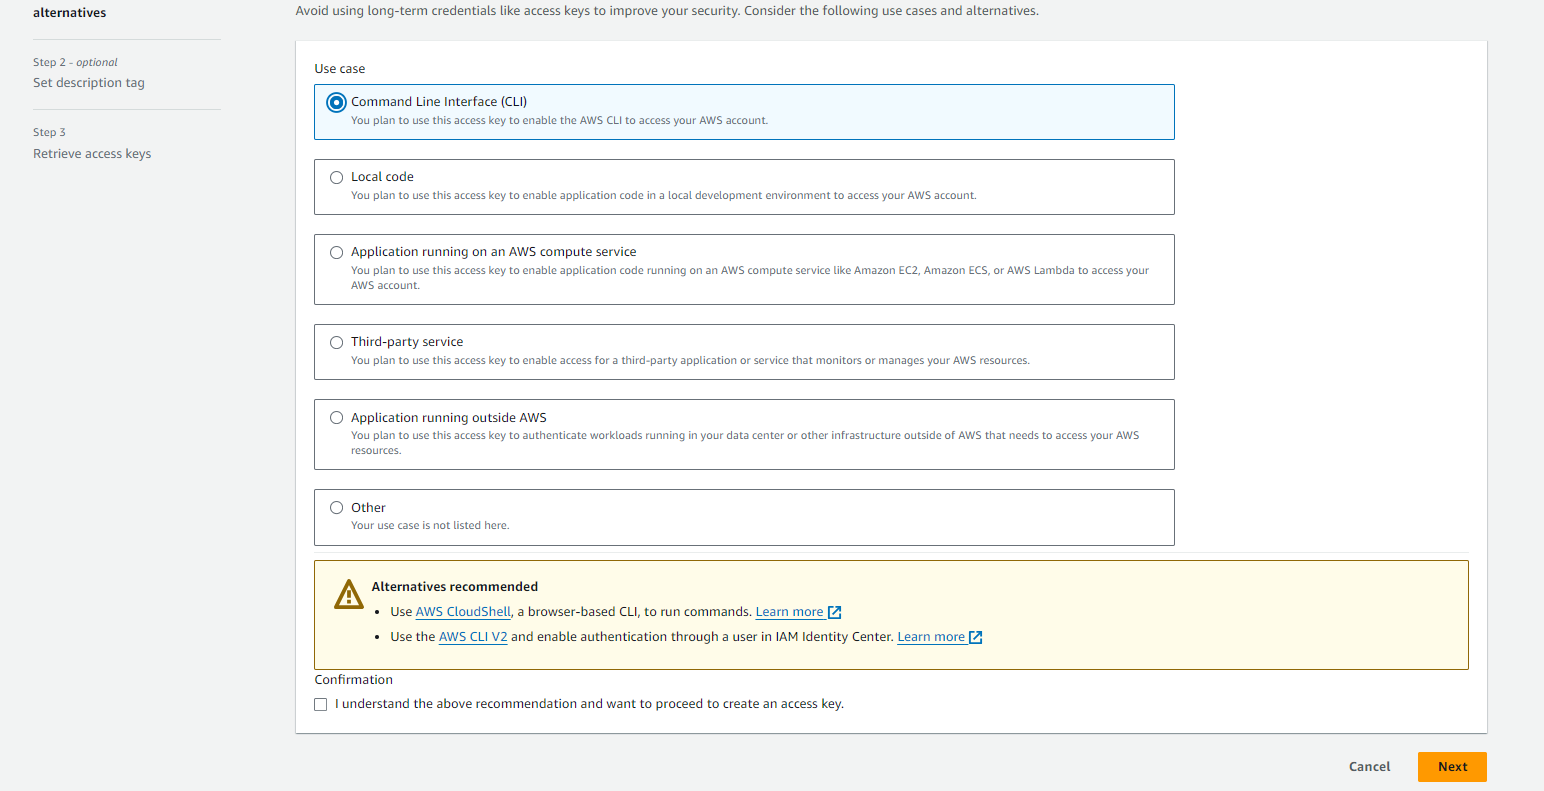
Step 6:
- Select the use case as command line interface(CLI) then click next.
Step 7:
- Once the Access Key is generated, copy the access key and secret access key and download the .csv file.

Step 8:
- Login in to the Infisign using admin credentials.
- Navigate to the browse app catalogue and select AWS

Step 9:
- Click Add integration

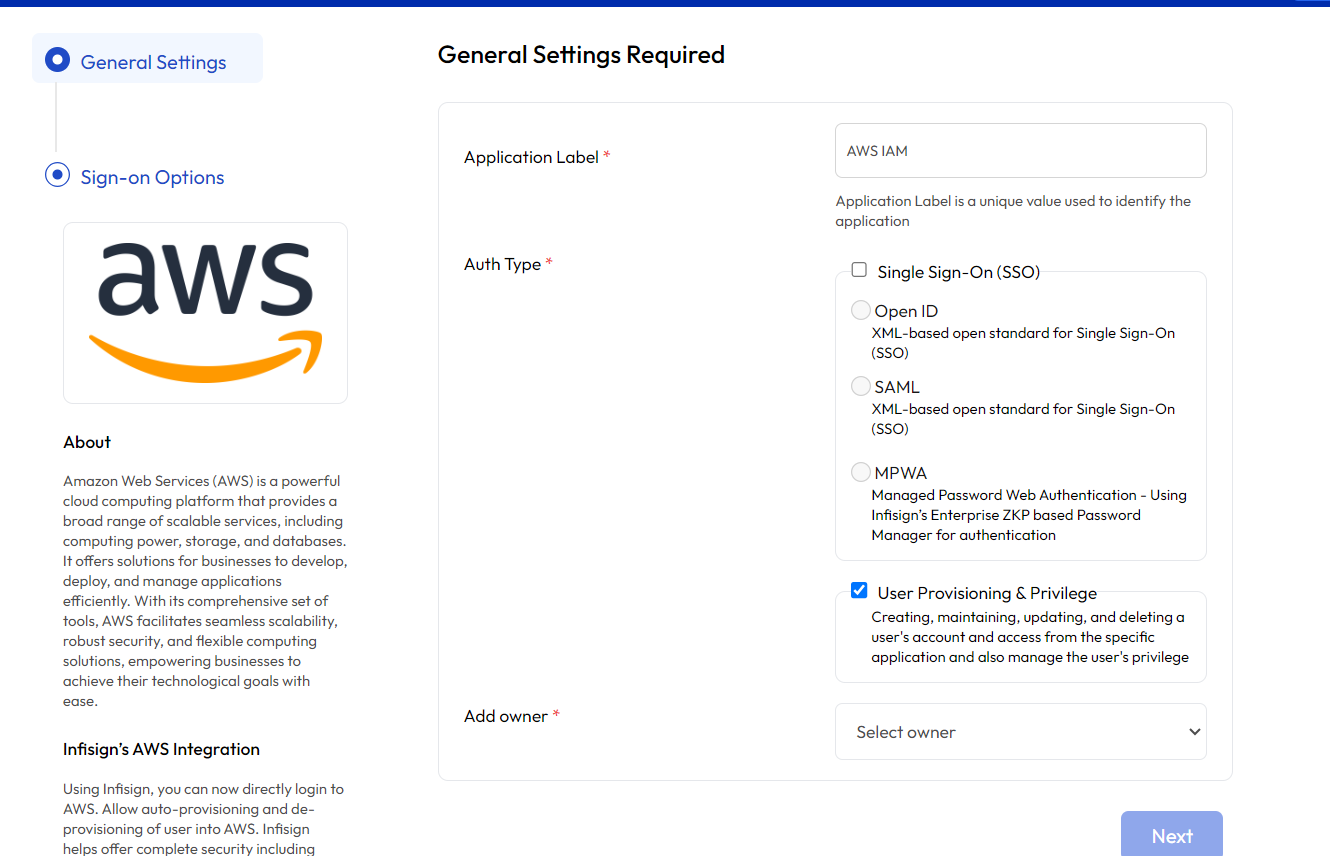
Step 10:
- Enter the application label and select the user provisioning & privilege.
- Select the Application Owner and click Next.
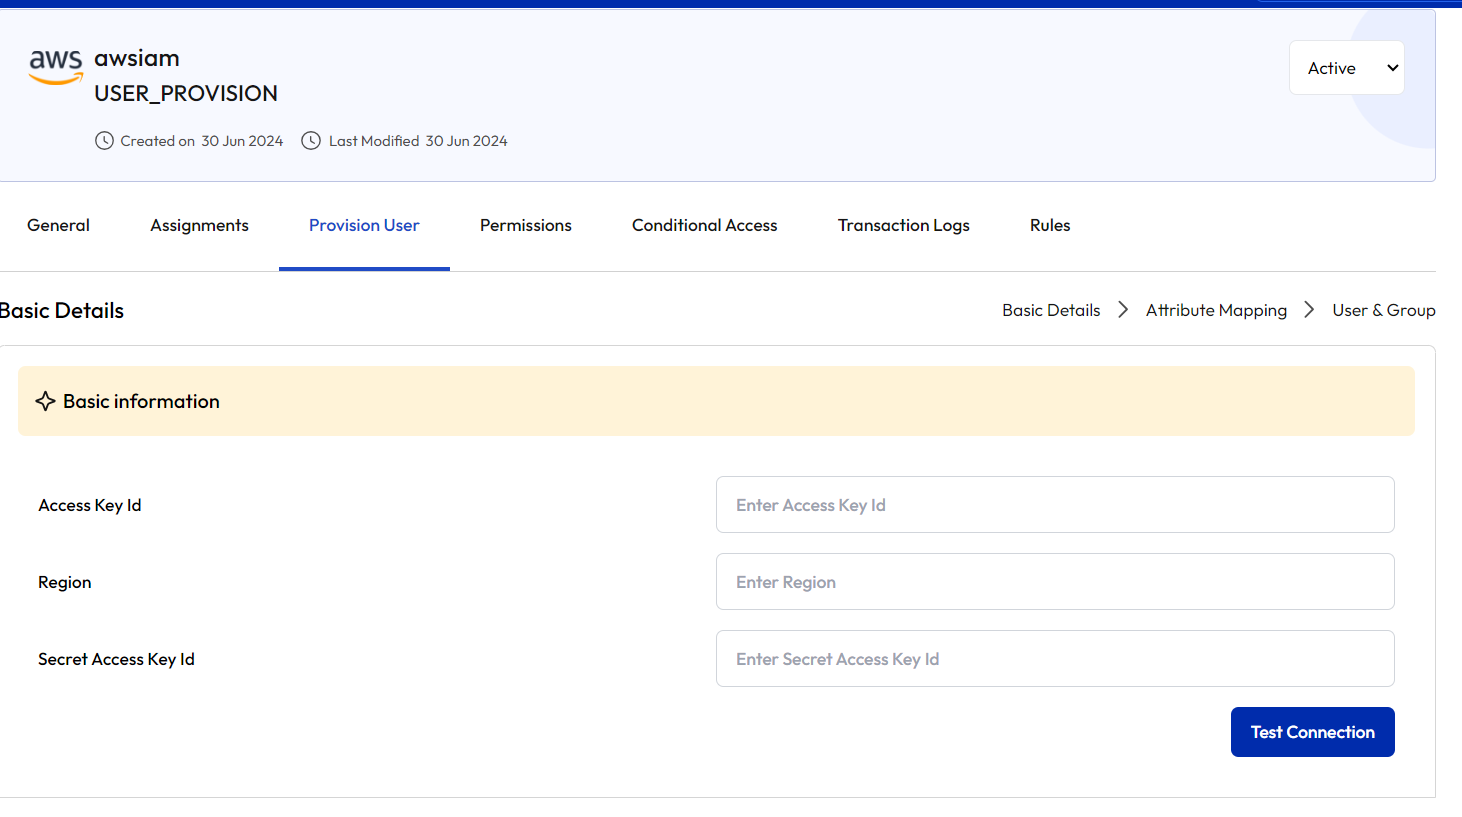
Step 11:
- Once you click next it navigates to the provision user there, paste the details that we get from the AWS and click verify connection.