Azure Directory Integration
User Directory - App Integration (Azure)
To begin Azure Integration, the user needs first to complete the following steps for App Registration in their Azure portal and add the required data as given in their Azure Portal to finish the integration.
Step 1:
Sign in to the Azure Portal.

Step 2:
From the dashboard, Select Azure Active Directory under Azure services list.

Step 3:
On the left side menu, click on the App Registrations option.

Step 4:
Click on the New Registration option at the top which will direct to the page for registering the Application. Fill in the required fields and complete the registration.

Step 5:
Once the Application is registered, you can see the “Client ID” & “Tenant ID”.

Step 6:
Next click on the API permissions option from the left side menu.

Step 7:
Click on Add a permission option that will open a new pop-up window.
Step 8:
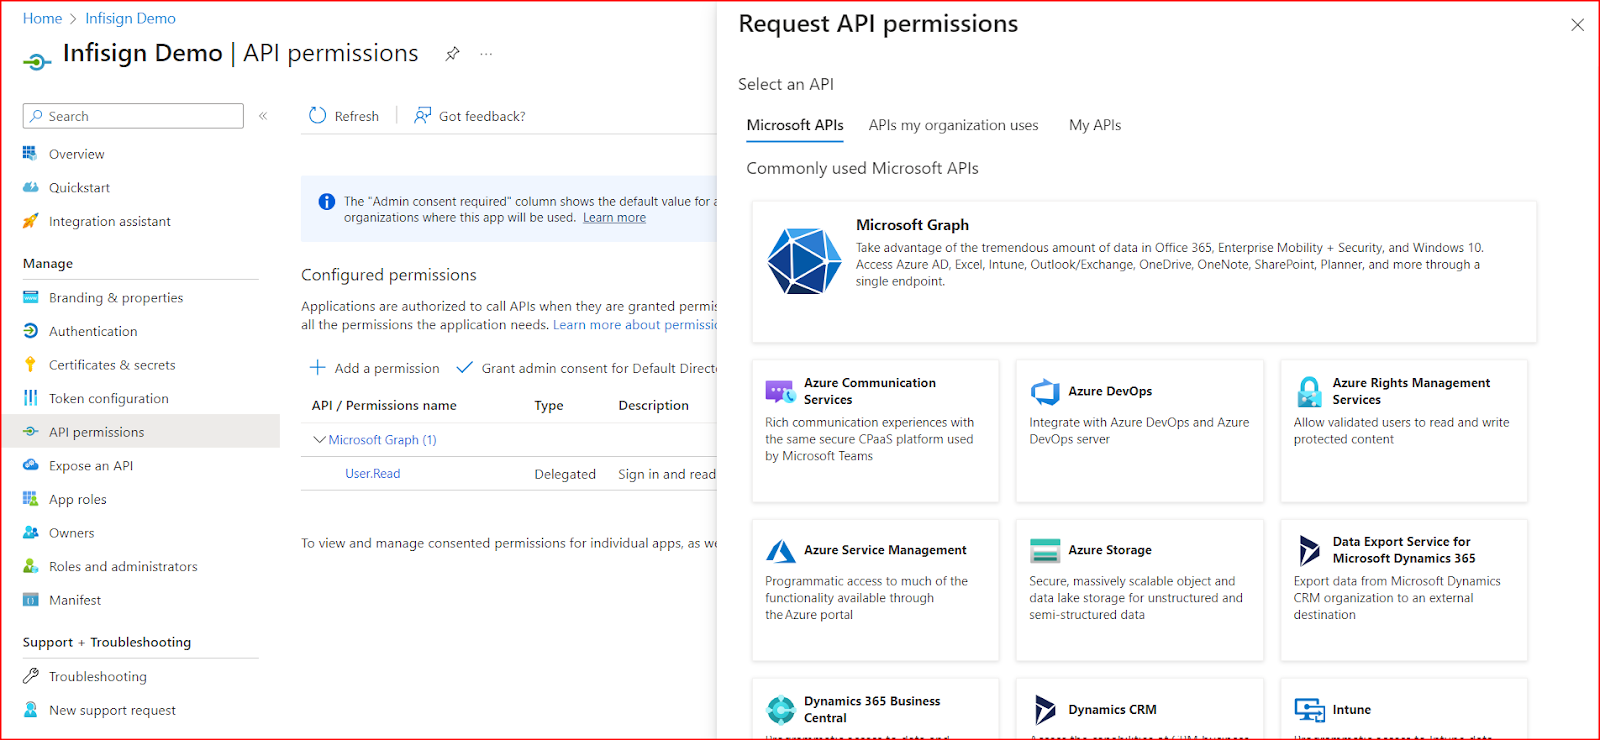
Click on the Microsoft Graph option that opens the Request API permissions page.

Step 9:
Select the Application Permissions option, enter the required permissions such as {{ Search User - user.Read.All & user.ReadWrite.All }} now click the Add Permissions button. Once completed, the configured permissions list will be visible.

Step 10: Now if the organization wishes the Group user the Application Permissions, Follow the steps {{ Search Group- Group.Read.All & Group.ReadWrite.All }} for the application permissions Once complete, the configured permissions list will be visible.

Now the following permissions are granted from Azure AD

Step 11:
Next, select Grant admin consent for Default Directory, and in the following pop-up, select Yes.

Step 12:
To add Client secrets, from the left side menu, select Certificates & Secrets.

Step 13:
Click on New client Secret and in the following screen, enter the required description and click on Add. Next, copy and store the client secret value.

Step 14:
Now Login to Infisign application with the super admin and click on the Directory>Directory Integration > Add Directory, Select Azure and click next

Step 15:
Enter the Client ID , Client Secret & TenantID in the Add Details page, and click the Test Config

Once Test config is done select the option Read Users by Group, select the required group from the list and Sync Directory

Step 16:
Once synced and next will be redirected to the User Mapping , Kindly Map the mandatory attributes

Step 17:
Now Select the Scheduler option and proceed

Step 18:
Now the user will be synced and Invited to Infisign for Onboarding
