SAML2.0 Configuration for Salesforce on Infisign
Supported Features
The Salesforce SAML integration currently supports the following features:
- SP-initiated SSO
- IdP-initiated SSO
- SP-initiated Single Logout
Configure SAML
Step 1: Login to Salesforce with the Admin username and password token used for User management settings in Infisign.
Step 2 Either
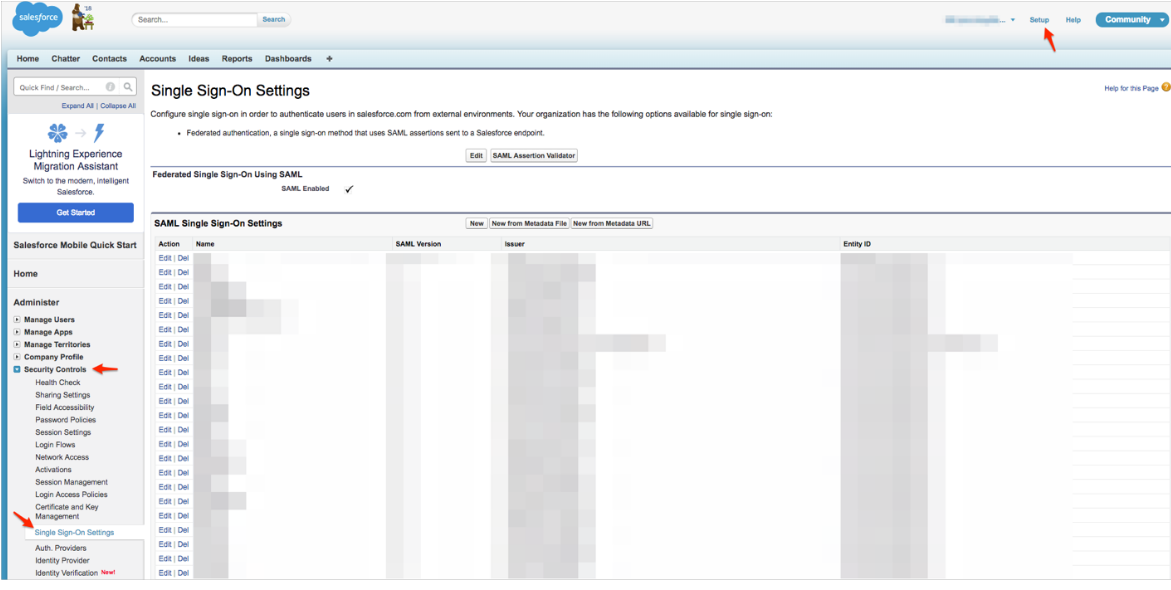
Salesforce Classic: Navigate to Setup>Security Controls>Single Sign-on Settings
Salesforce Lightening Experience: Click the gear icon, then navigate to Setup > Identity > Single Sign-On Settings

Step 3: Now in the Single Sign-On Settings page, Click Edit ‘
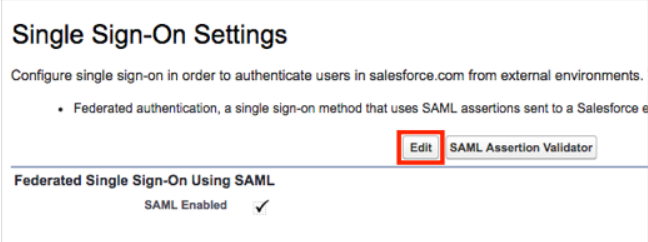
Step 4: Check the SAML Enabled box to enable the use of SAML Single-Sign On, then click Save:

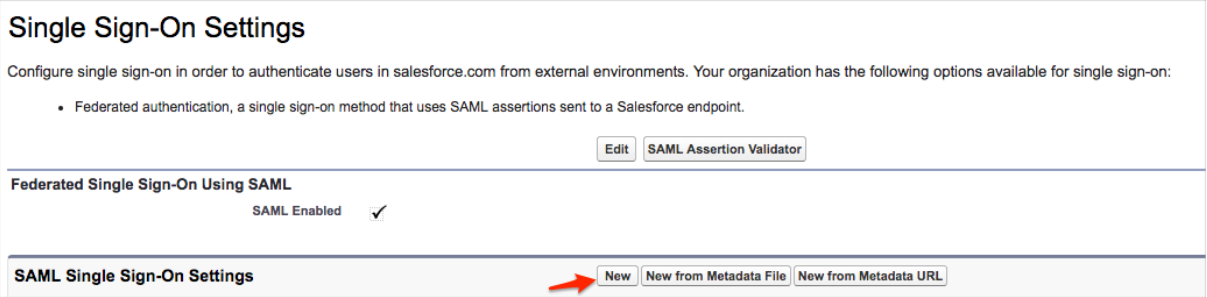
Step 5: Click New:
Step 6: Enter the Details in the required fields
Name: Enter a name of your choice.
SAML Version: Make sure this is set to 2.0. This should be enabled by default.

Click Save.
Step 7: Do the following:
- Save the Login URL value
- (Optional for SLO): Save the Logout URL value
- (Optional for SLO): Click Download Metadata

Step 8: Once all the above settings are done, Now click the Settings > Company Settings > My Domain > Edit

Step 9: Now once the Edit option is clicked will direct to the page here need to enable the Authentication service required for Login

Step 10: While enabling based on user needs the option via "Login Form" can be enabled based on the requirement
Step 11: Once all the settings are done, Click Save
Step 12: Issuer: Sign into the Infisign AdminDashboard
Click on the Application — Browse App Catalog — Select Salesforce

Step 8: Now Click the option Add Integration

Step 9: Enter the Application Label and enable the option - application visibilty (if required) and then click Next

Step 10: Enter the App Login URL from Step 7,Upload the Metadata file by downloading from the same Step 7and click the option Verify XML

Step 11: Once the XML file is verified the Entity ID will be filled automatically and check wether onboard user ID option selected from option for Name ID Field dropdown

Step 12: Click done, will get a popup as the Application created successfully and will be available in the Application List Page.