SAML2.0 Configuration for Slack on Infisign
STEP 1: Sign in to Infisign with the Admin Login Credentials
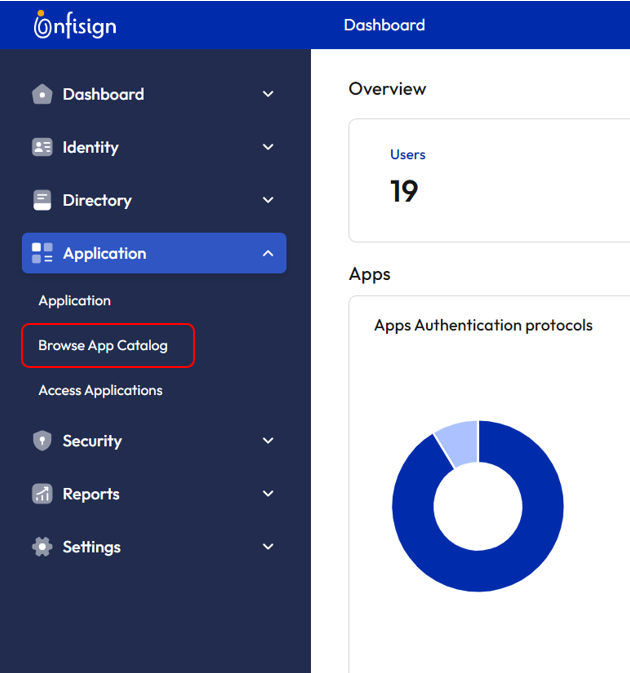
STEP 2: Now in the Dashboard Screen, Click on the Application > Browse App Catalog page will direct you to the Browse App Integration Page
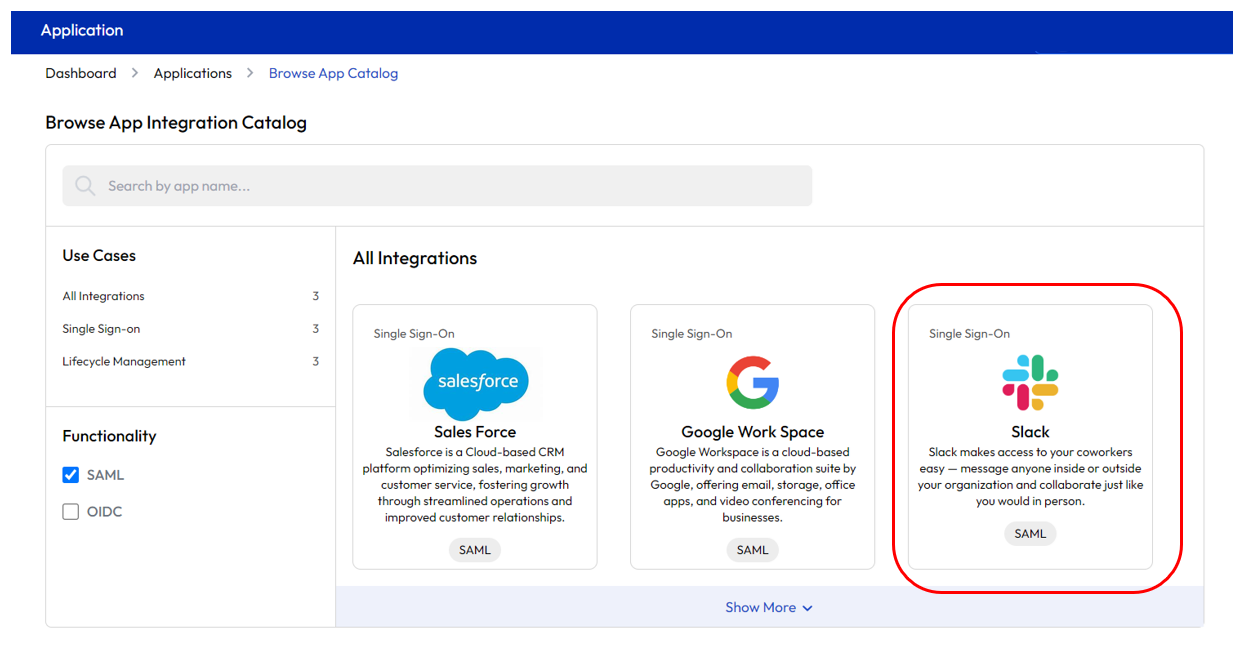
STEP 3: Click on Slack to proceed with the Application Integration
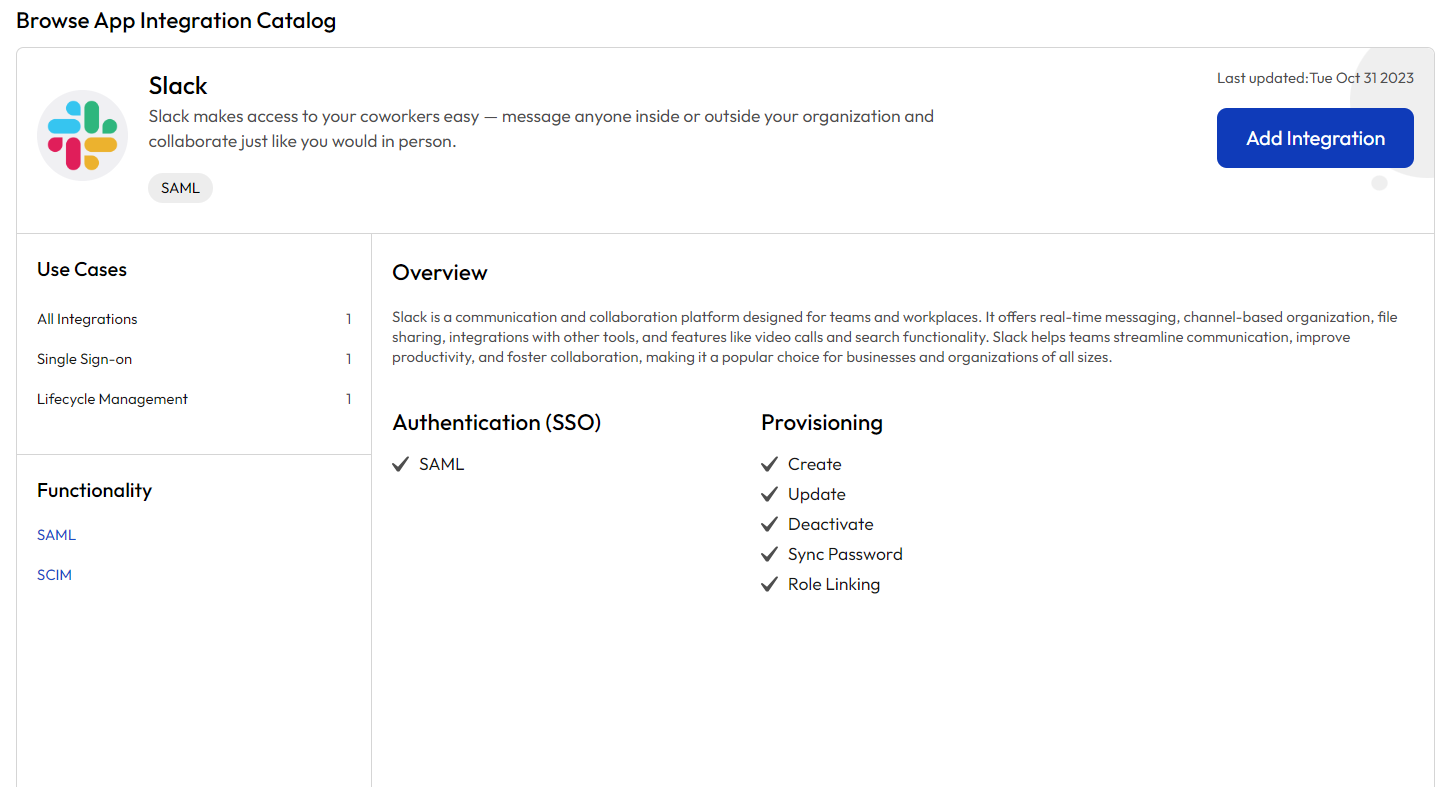
STEP 4: Once Clicked and proceeded, you will be directed to the Slack Integration page here click the “Add Integration” button to proceed
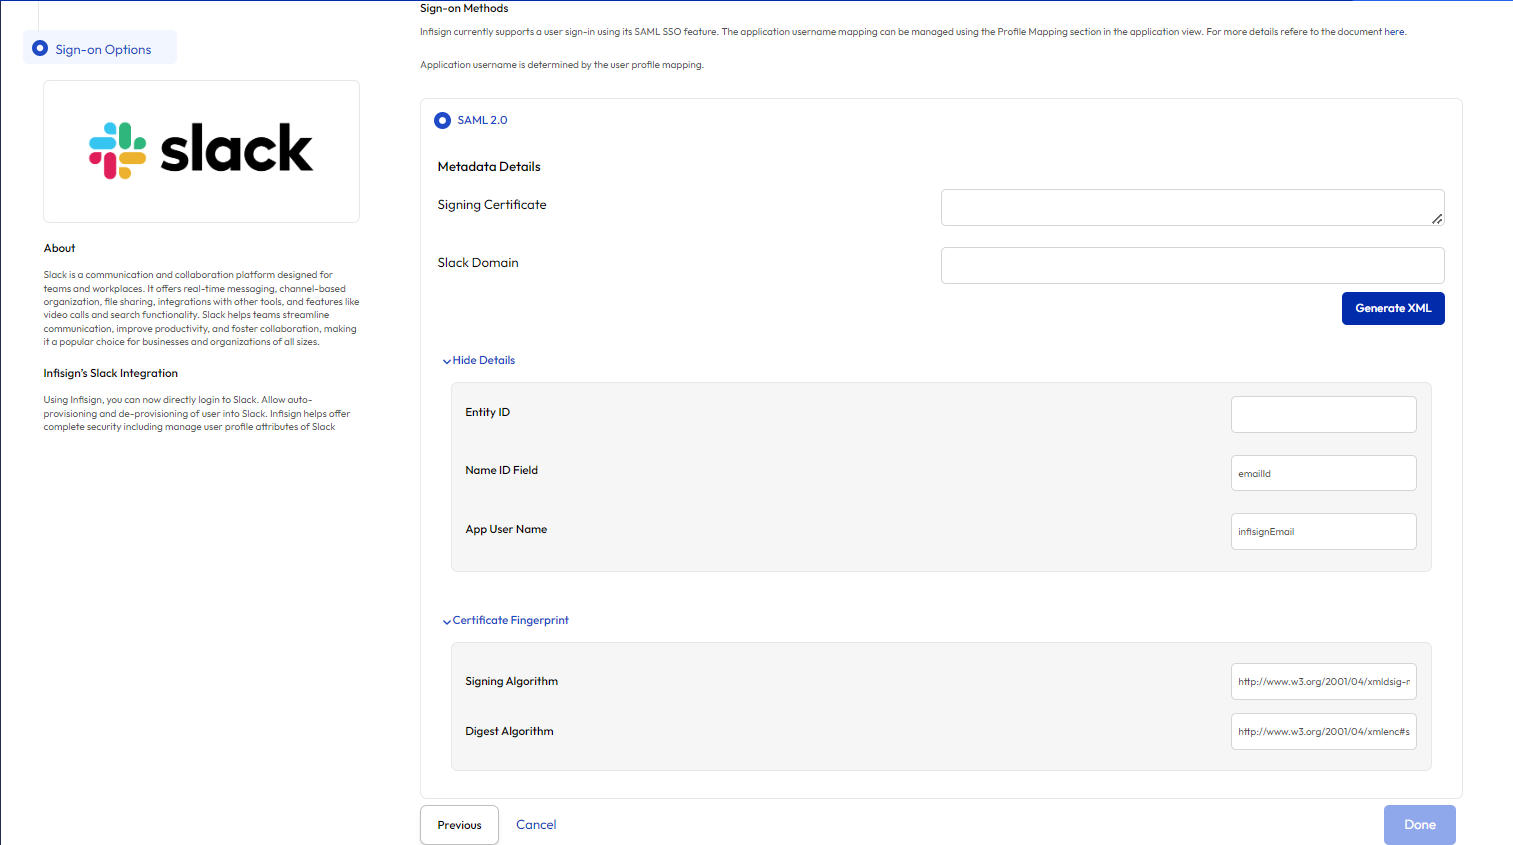
STEP 5: Enter the Application Label Name and Click Next. This will direct you to the Sign-on option page
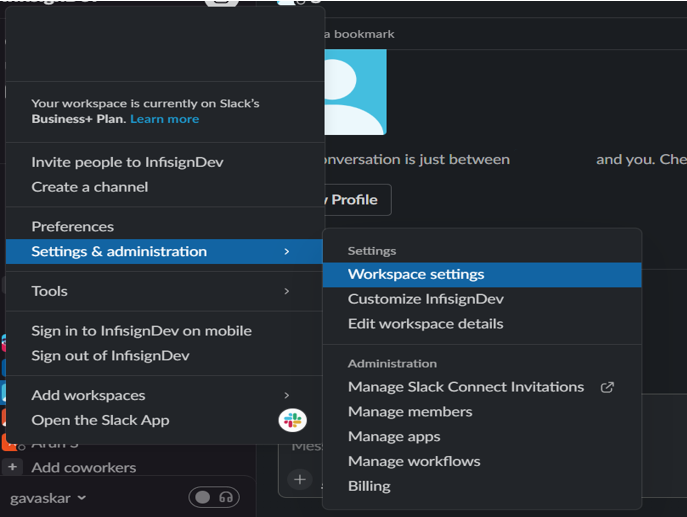
STEP 6: To enter the details for the previous step need to log in to the Slack Admin Account
Once Logged in Select Settings & Administration from the menu, then click Workspace settings.
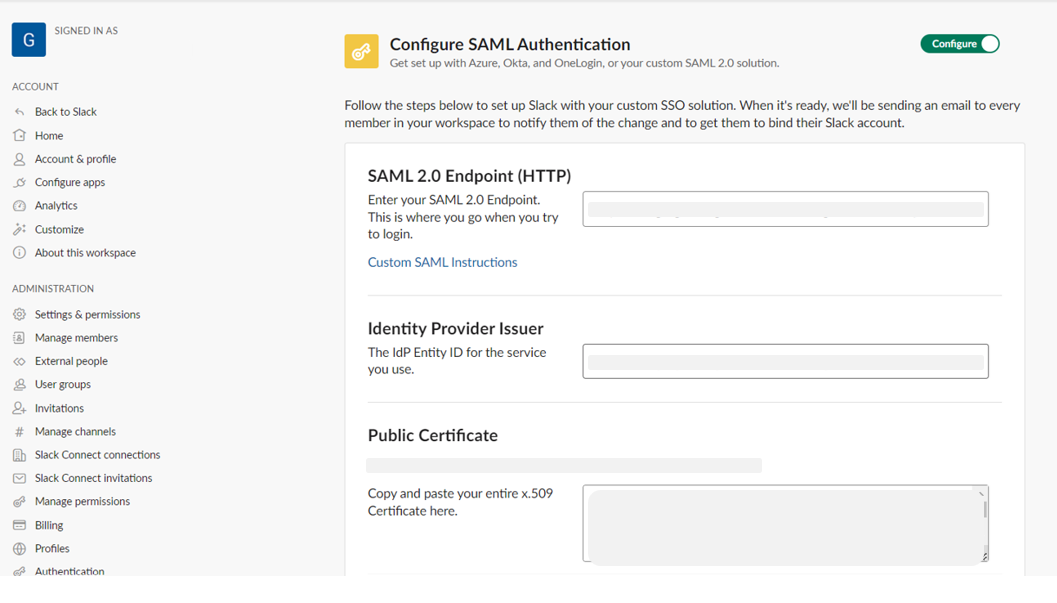
STEP 7: Click on the Authentication tab in Settings & Permissions Page
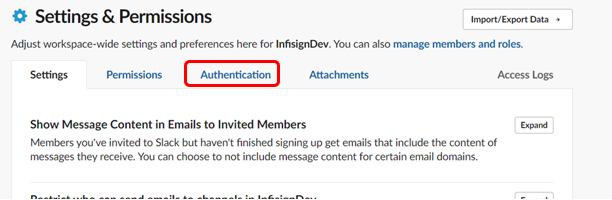
Once directed to the Authentication tab, Next to SAML Authentication Click the option “ Configure”
STEP 8: Enter the below details in the required field
SAML 2.0 Endpoint (HTTP) - https://staging.infisign.net/saml/{{tenant_id}}/idp/sso/redirect/
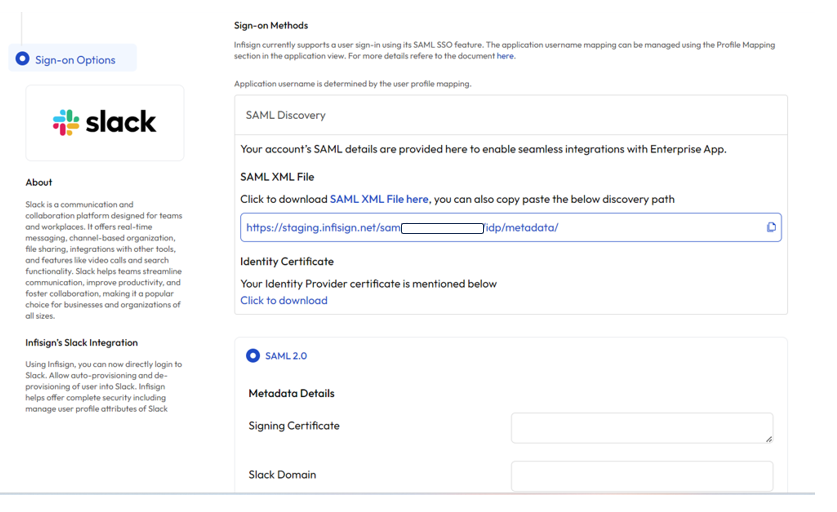
Identity Provider Issuer -https://staging.infisign.net/saml/{{tenant_id}}/idp/metadata/
Public Certificate - To get the X509 certificate Click on the metadata URI and copy paste the x509 here. in Browse App catalog Integration screen or you can use the below link https://staging.infisign.net/saml/{{tenant_id}}/idp/pem_key/
STEP 9: Next to Advanced options, click Expand. Choose how the SAML response from your IDP is signed. If you need an end-to-end encryption key, tick the box next to Sign AuthnRequest to show the certificate.
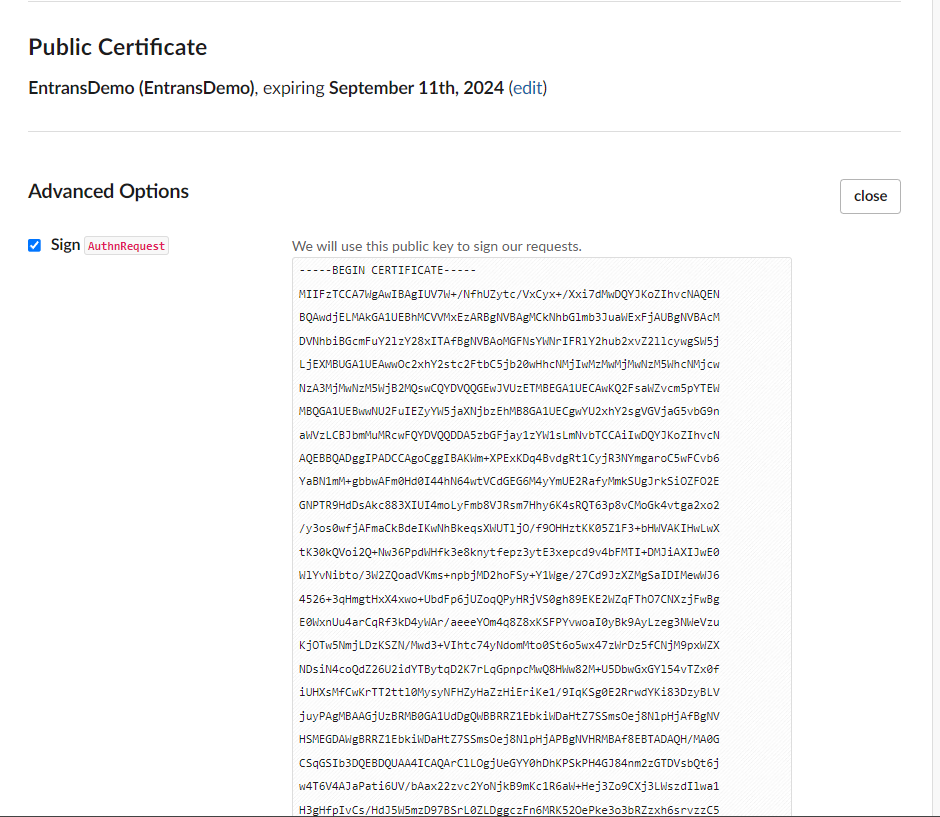
Copy the Public key available under the Sign AuthnRequest and Paste in the Signing Certificate option in the Infisign Portal
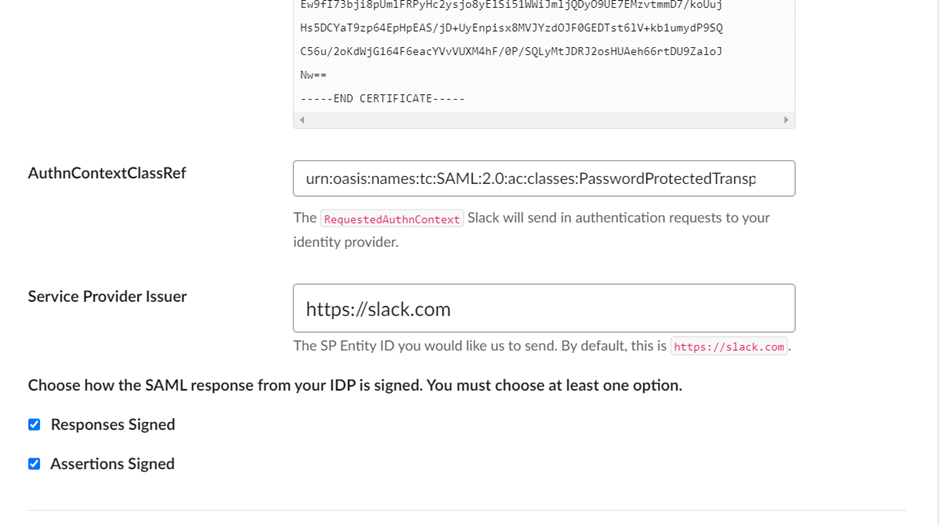
STEP 10: Enable both Response Signed and Assertions Signed in the Slack Configuration
STEP 11: Select Save Configuration to Finish
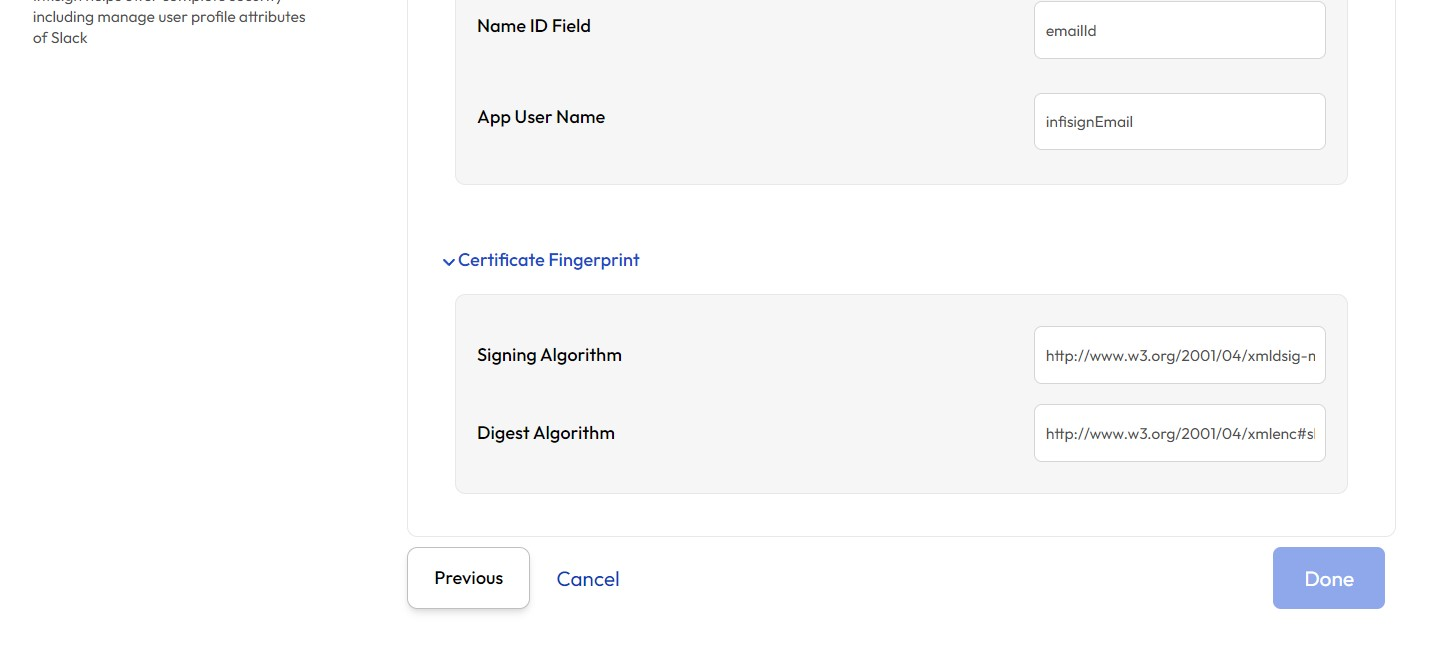
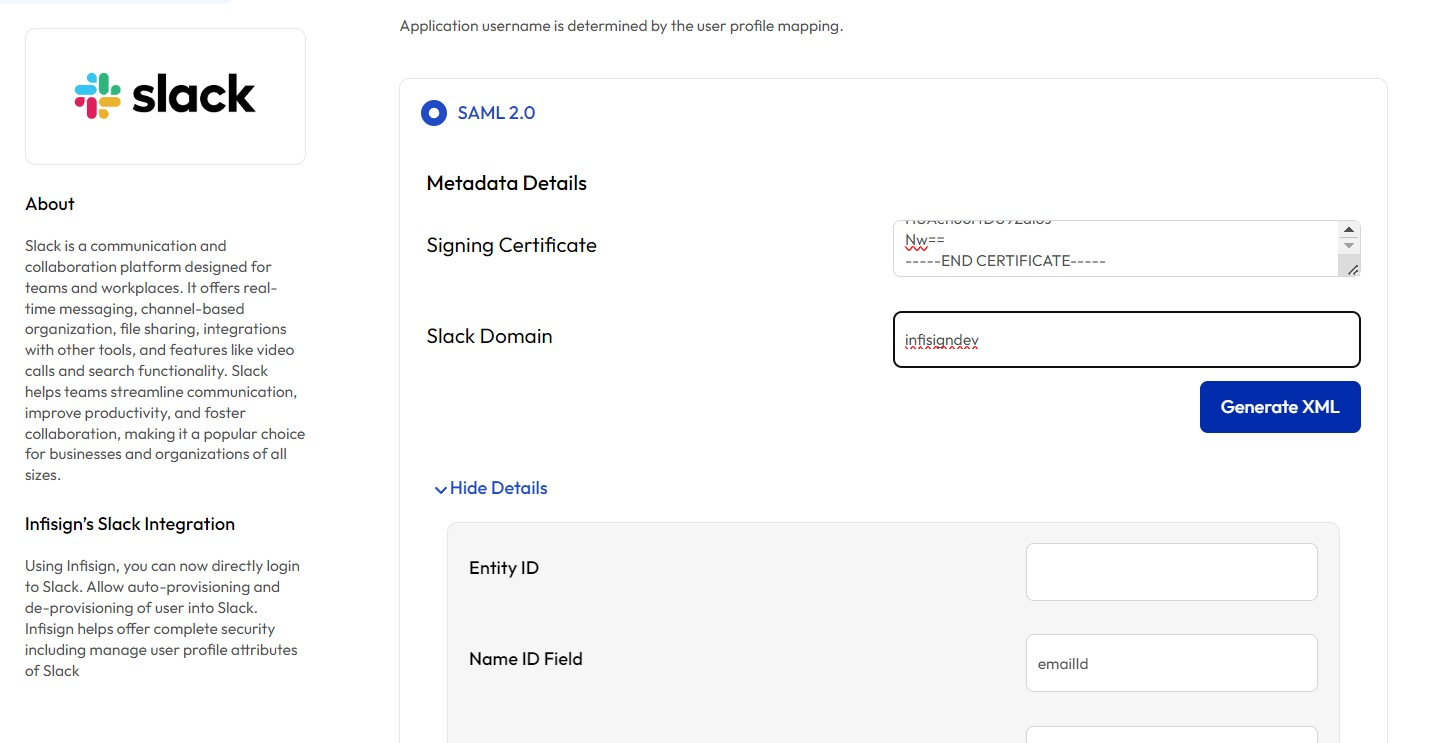
STEP 12: For the Slack Domain Name, Enter Your Domain Name
For Eg : https://{{Your Domain Name}}.slack.com/

Click the option Generate XML other fields will be automatically Fetched
STEP 13: Click Done, Now your Application will be configured in Infisign Portal